Showing posts with label enamel. Show all posts

Sunday, 22 June 2014

Commission


A friend commissioned this pair of matching pendants for a special occasion. The dragon motif was provided by her. I took a break from working on our new house refurbishment to make this commission and another one I'll be posting soon.


Enamel over copper (transparent enamel over white opalescent enamel and black china paint) sterling silver settings and sterling + glass beads.


Saturday, 5 April 2014

Comissions

I am very busy with work and the house, but somehow also trying to find the time for two enamel commissions.

I am also making a few other pieces in the meantime, since once I put the kiln on it makes little difference for me to make one or several pieces at the same time. It actually helps me keep a rhythm, since there is quite a bit of waiting involved in enamel making.

Counter-enamelling
I won't say it is always this way (that a batch of pieces is preferable to a single one), since in some cases it isn't, but for most of the work I do and my working style, it certainly is. And when it comes to my "weak" spot, the setting of the enamels, let me say this is not the case at all! at the end of this, like usual, I'll be left with a few enamels I won't have the time, energy or budget to make settings for.

Now, I am not sure if I'll be allowed to show these commissions once finished, but most certainly not now. I still have some images vague enough, or focused on the "filler" enamels, that I sure can show.

As shown on the picture above, I've taken a liking to counter-enamelling pieces first, with no gum, and without firing the coppers alone first (as I learnt in school). So I just wash the back with strong detergent, counter-enamel with a spatula and fairly dry counter-enamel, and fire. I leave the pieces to cool and shed firescale, then pickle. Then I'm ready to enamel the front.

White opal enamel bases - some opals become transparent
when overfired, then come back on the next firing
This is working very well for me. It may be a huge mistake on thin, flat or very odd-shaped pieces, which may get warped, but these strong domes do beautifully.

An experiment in my Mist series
One of my batches is of my Mist series. On two of these, I am experimenting with colour! The blue one is in a way a mix of grisaille and china paint, which in fact all of the Mist series are, but this one in particular, being blue, really reminds me of grisaille in the style of Andreu Vilasis as I learnt in school.

One of my pyrometres

I had a bit of a horrid moment when I thought my pyrometre had kicked the bucket, but it was just a burp. I had to unscrew the back of the oven and push it further in. Phew.

Painting on glass

Evaporating oil off china paintings


One of the commissions in the early stages

I am rather set back with my first commission, which thankfully is not urgent (yet! at this rate...) due to the patina for the settings. The enamels are already finished, and in fact, so are the settings, except for the patina and actually setting the enamels in them, and attaching the bead strings, which are also made.

Usually I use a Spanish product to create an "antique silver" or even black finish, like in my Black series.

This product doesn't last long and what I had left was useless, but I failed to notice this before my latest trip to Barcelona. I really cannot find it online (other than for an exorbitant shipping from Spain) so I decided to try liver of sulphur for the first time. I cannot achieve the same result with it! so I am gonna have some of the patina I am used to shipped by a friend in Spain. Other than the patina, the pieces are nearly finished!


Iris stole Loki's seat next to me, so he sat on top of her

Tuesday, 5 March 2013

Enamelling classes online? a survey

Hello everyone!

UPDATE 2016

I now have this project in the backburner. I registered a domain, enamelworkshop.com, created a landing page in the website, and have set up a newsletter.

As I have more information, whici will still take a while, I will keep the subscribers to the newsletter updated. This will not happen for a while yet, and I will not be spamming ;) so if you don't want to miss any update...

SUBSCRIBE!
See you soon,
Mer


--------


I've been pondering about this for a long time now. I got the idea due to the very positive response I got to the videos I posted to Grains of Glass (all of the videos I took at the time are here in my website).


09P: Shading enamels from Mer Almagro on Vimeo.

Even though my purpose when filming them was more illustrative for potential customers than didactic, I got many thank-yous and people telling me they had learned from them. I also got a lot of questions. I did answer the best I could within the scope, but I also saw that the videos had a great potential to actually teach, reaching people anywhere in the globe, which is not possible for me to do locally.


Of course in order to do this properly I would have to spend a lot of time and effort, so it would become sort of a... job? My idea is not to be the sole teacher but to have guest contributions as well. I have also contacted people in other fields (sound, image, coding, etc) that would offer their knowledge in order to create a professional product.

Before jumping head first I thought I should probably make a survey. I made one here:

FILL IN THE SURVEY

If you would be at all interested in enamelling classes online, at any level, it would be very helpful to me if you could take a moment to fill it in. You can also forward the link to anyone you think could be interested.
The survey is anonymous and all questions are optional.

Perhaps together we can make this possible.

Any other suggestions are also welcome, here through the forum or directly to my email: mer.almagro@gmail.com

Many thanks to everyone in advance!
Mer

Thursday, 15 March 2012

Hair and two new hats

Yesterday, I went to the hairdresser. I had not gone to one since 2004 or thereabouts. Before that, very long stretches of time passed in between visits, too. Simply, it has been a very rare occasion that I have come out of one satisfied (and a few of those where happy freak accidents).

One such time is when I got a haircut in an Afro salon (to fix a disgraceful haircut I got talked into). This woman actually knew how to deal with curly hair! I have always wanted long hair anyway so I switched to cutting my hair myself every many months or years. It is actually very easy if you want a simple haircut (which is always advisable for curly hair anyway!). I follow this technique. If you Google that you will find more info, even some videos. I cut my boyfriend's hair this way as well. His is very loosely wavy which is less forgiving than mine (which curls up and you wouldn't see hem imperfections anyway), but this has always worked beautifully.

But I digress. Yes I went to the hairdresser to get my hair lightened. I have become quite bored with my appearance of late. I blame this on a recalcitrant eyelid eccema due to which I can't wear makeup, not in the way I like anyway! So hair it is, I decided to sacrifice my "virgin" (all of it was not chemically treated and only very seldom I briefly bring a hairdrier near it) hair in the altar of boredom.

Basically I wanted to lighten slightly all over, evenly, and gradually lighten more and more later on, then have a warm coppery tone all over. I did want lighter tips and darker roots to avoid high maintenance of roots, and because I just like lighter tips.
I chose a salon because they use Elumen hair dye which I wanted to try, and I am very happy with the actual colour. Not the bleaching though. I was advised against all over lightening since this supposedly damages the hair too much. I said I just wanted this effect, do it any way you like, but please no stripey highlights. Well, I got, you guessed it, nearly the opposite of what I asked for :D Got some stripey highlights on my crown, with to high a contrast with my very dark natural colour, and the tips of my hair look nearly the same, much darker. Sigh? I also don't understand why burning a few strands a lot is better than burning them all just a little, especially if this is not at all the effect I was looking after.

Quick phone snap my friend took

Again, I think this happened due to my hair structure. Even when dyeing, curly hair doesn't behave in the same way. I have a great taper from roots to tips (which resulted in a much smaller volume of actual hair being highlighted at the tips than the roots when done the usual way), and once it dries it behaves very differently from straight hair (the curls make deep shadows, but the crown lays flat). Will I ever learn?

I am left with two choices, throwing away more money to apparently not get what I want, or trying to do it myself. We'll see...

On to more positive things! I have published two hat patterns this month :) both match other patterns because I am perhaps a little bit obsessed with sets!

First came my Esporòfits Beret. I have mentioned it before. I had it tested by some great ladies and now it is published too!


It is now available in Etsy, Ravelry and Patternfish!

For this one I also took a video illustrating the cast on method (alternate Twisted German and Long Tail COs):


Next in line is the Chordata hat. This one was designed quite organically. I wanted the hat to cover my ears without coming down too low over my eyes, so I made a piece of ribbing for the back, and then two flaps picked up from there and joining at center front, from which stitches are (partially, since the ribbing is continued uninterruptedly) picked up for the body of the hat. Once finished I realised I could also wear it backwards in a similar manner. I went for a slouchy hat but the pattern includes directions for a more fitted one as well:


Already available in Ravelry, soon also in Etsy and Patternfish :)

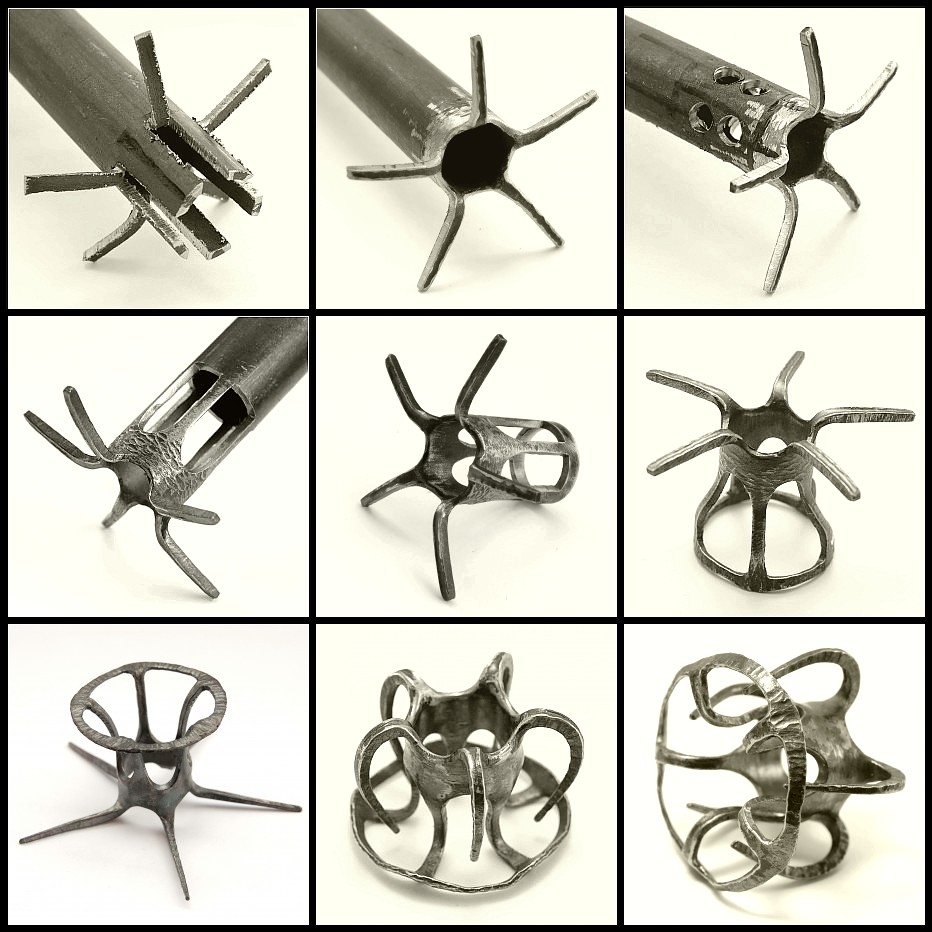
As I was writing this entry, I received a wonderful package from the amazing artist János Gábor Varga: Etsy shop, Website, Flickr, Boticca interview. I love the clever ways in which he manipulates simple chunks of iron! His progress pictures are always fascinating. Finally I own one of his pieces :) I couldn't pass this beautiful one up, originally titled Medusa from Italian (such we call jellyfish in most latin languages), it does indeed look like one of these fascinating creatures, and my screen name being Medvssa in many places, I couldn't pass it up! 

Work in progress and finished piece, pictures by János

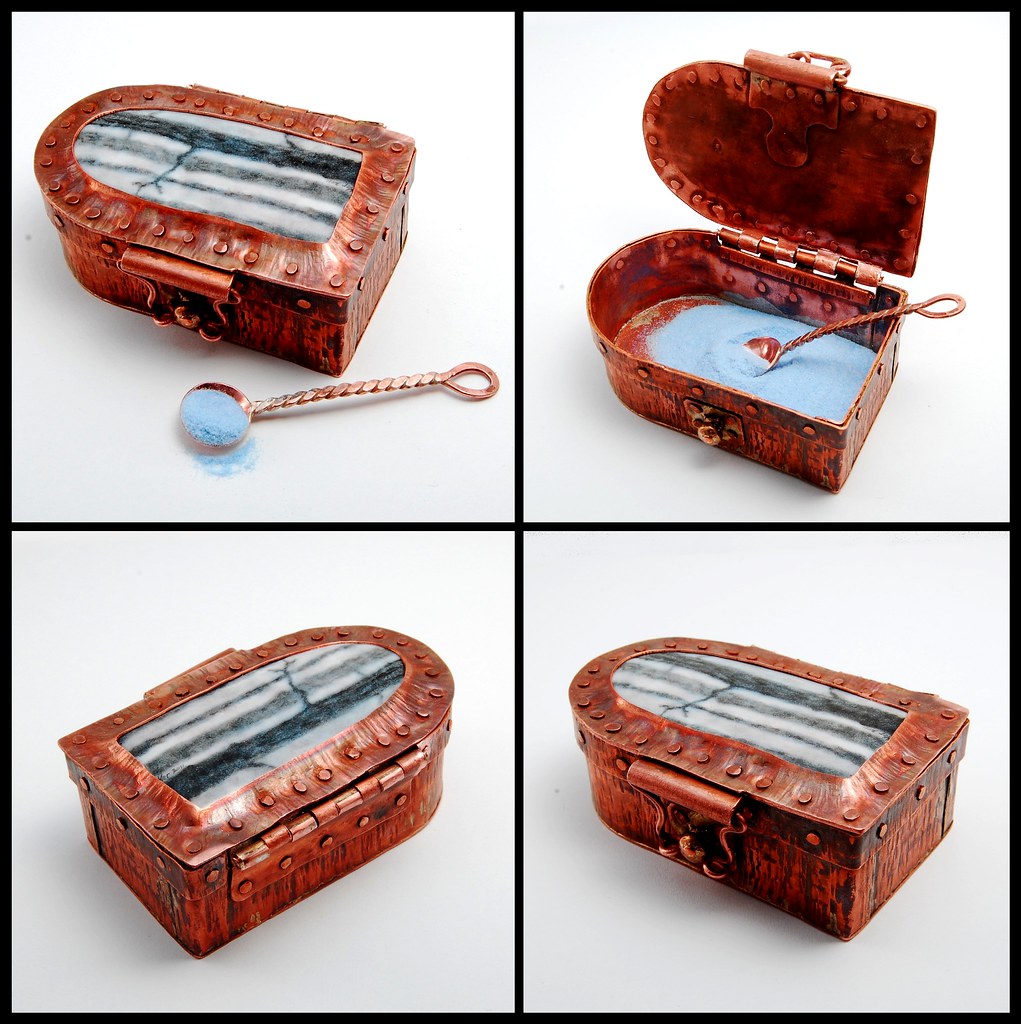
Together with this one, I received a collaboration piece he worked on as well. I sent him two enamels and he sent one of them back set in a beautiful riveted copper box (it was admittedly a rather big enamel for a pendant!) with cute matching spoon. His pictures are better than any I could take so here it goes:

I have to see what I use it for, I wouldn't be able to decide which enamel to place in it!
So that will be all for today. For the next day or two I want to work on an unfinished jersey dress I started long ago, hopefully so I can wear it to the Exhibition opening this Friday. I have opened a Pinterest account, and I have found myself pinning lots and lots of jersey dresses with details I like to one of my boards (aptly named "jersey"? haha). Those will be ideas for dresses to come since this one is already cut and partially assembled! lot of ideas though, but very difficult to find the right shades of fabric! There is only one local fabric store with limited choice. I have to find out which stores to visit in Brussels or Antwerp :)

Phew that was a long post :)

Sunday, 19 February 2012

Group Exhibition

Image by Annie Bertram
I will participate in this exhibition in March / April with some enamel work. More info coming soon! :)

Friday, 3 February 2012

Merging blogs

Today we had our first day of real snow. It has grown dark now, and big flakes are still swirling outside.

The view from my living room window this afternoon

I come back from my last day of work. After being unemployed for a few months, which I cannot say was too bad since it gave me plenty of time for knitting and designing, I worked for three weeks at a 3D printing company, in the finishing department. This proved a bit too hard on my joints and, still in my temporary test period, I had to stop. The job and the people were cool and for that I am a little sad, but I am also happy that the pain in my joints and the foreboding of injuries to come have been lifted from my shoulders. My last two days were part-time and I already feel improvement, which is a relief.

On to a new start. I have decided to study, to obtain some certifications that may help me find a job that I will find interesting and that won't be too physically demanding. Meanwhile, I will pursue knitwear design in full. It hasn't worked too badly for me, and I am hopeful.

These last months, enamel and jewellery-making have taken a back seat. I see a trend in my interest, related to the seasons, and I tend to knit more in winter, and enamel more in summer (to the extent that I stop the other activity altogether!). I am not too sure that this is actually related to the weather, since enamelling in summer is much warmer than holding some yarn in your fingers :) but perhaps there is something to it.

I haven't been knitting for that long, just since March 2009 (it really seems like yesterday!) and I still have to break this summer curse. Last years I wasn't too serious about it, but this next summer I will try harder. I do love lighter knits, too. Although I have to say, I am very fond of winter :)

Perhaps, decompartimentalizing (is that a word??) would help. In this spirit, I have decided to merge my blogs, and have just imported all my knitting entries over to this one. I was posting in either one or the other, it appears, and I did not post all that much anyway, so I do not see the point of keeping both. I would merge my websites but... I still haven't made my knitting website. Which is a good thing since I would have to merge them now! So I will simply redesign my website and include everything in it. I hope to work on this this weekend. Deadlines do not agree with me so I will see if I finish :) more likely that I finish if I don't stress over deadlines.

If I am honest there is also another reason why enamel and jewellery-making have fallen to the back-burner. Simply, enamelled jewellery of the kind I make is very difficult to sell. It involves many work hours, costly materials, and why not say it, a lot of knowledge and experience I had to gain after many years of work.
This is not too obvious in the finished work, cheap copies could easily be mass produced in cheaper materials (if only the style was trendy anyway) and most people probably wouldn't be able to tell the difference. At least from internet pictures. I totally understand that and I do not imply that because of my work's intrinsic value people should fall over their feet to buy it. I do it because I like it, and if people don't like it, or don't think it is worth so much, or can't afford it, that's fine. But I do find it more difficult to dedicate myself to it fully because of this. Not least of all because I need to invest a significant amount of resources in materials and tools alone. Knitwear design in this respect is more fulfilling.

I do have another idea that has been lurking at the back of my mind and that I would like to realize at some point, sooner than later. I have dabbled in shawl-pins, gifted most, sold a few, kept a pair. They were just prototypes, and beaded. I would actually like to expand in this idea, perhaps sell them. I would like to include enamel in them, although this is technically difficult (enamelling involves firing at high temperatures which softens the metal, so it would have to be forged after enamelling, which endangers the enamel), I want to try. Cast may be a solution, but this would make the pins too heavy.
I think about stitch markers too. We will see :)

Wednesday, 7 September 2011

Black Series, for "Heavy Metal" expo, NovaBelgica Art Gallery, 30 Sep - 6 Nov 2011

Image © Trëz Orb
Skull I, 2005
Skull III (crow skull)
All images clickable.

For the last weeks, with vacation breaks and other interruptions, I have been working on a little collection for a local exhibition here in Belgium.

I am very excited about this because of the theme and title, which is open to interpretation as if referring to the material or the music - both two of my great passions.
When I first heard about it I just had to ask Tim (gallery owner, whose blacksmith and sculpture work I really admire) to please let me participate! which he kindly did.

Skull X
Skull V (cat skull)
Radius and Ulna lariat
Venus Sigil
I have to say at first I had trouble coming up with designs. I was just too worried about it I think :D but that was just a temporary madness ;) as a main collection, I decided to go for a black series -and that is the very original title I am giving to it- and go back to a theme with which I consider I started to really find my own language, which is the skull (see Skull I above, from 2005), not so much because of the figure itself, but because it sort of set the tone for my work.

Skull IV
I decided to really focus on the skull itself again, and pick up where I left (after all I had only made two Skulls before!) and continue with Skull III to Skull X, and a few other sort of related subjects. You can imagine my delighted surprise when I saw the flyer for the exposition featuring a skull as well.

For this series I wanted to keep the work hours down and the pieces affordable, so I omitted more elaborate hand-fabricated settings. This also allowed me to produce more pieces in a relatively short time which I think kept the entire series quite consistent. I really, really enjoyed making these, most of all -no susprise there- the enamel work.

At the end of the day... I wonder why I have not made more pieces in this style, since it is actually the kind of stuff I like to wear the most :) this should be remedied and I think I will continue the series in the future.

Chalk Pentagram
TBC II, 2009
Skull IX (skull cup)
Skull VII (baby skull)
So, speaking about the enamel, I chose a white over black technique. This is against what we learned in school for vitrifiable paints (onglaze, china paints): build up darker colours over a white or light opaque background. Already back in school days, I remember making a little palette of the colours over opaque black, to see how it worked. It is certainly not possible to attain the same level of detail this way, especially with colour, but I think it is still valid, especially for certain subjects, in my opinion it fits these skull and bone designs pretty well.


I worked with a very oily mix on several pieces (for example Skull III, V, VII, X), which invites to paint more spontaneously, almost like with watercolour, and also allows a fluid line for symbols (Venus Sigil, Diabolical Sigil I), but then poses challenges when it comes to evaporating the oil and firing. I should make tests in the future with more volatile oils, but I am afraid the fluidity will also be affected.
A second or third fire with a mix heavier on the pigment helped achieve a little more detail here and there. I don't think any of the pieces has more than 4 fires (after the initial opaque base of black, which adds 2 to 4 more fires) which must be a record for me :)

For other pieces (for example Skull IV, IX) I worked exclusively with a thicker mix, and I could achieve quite a bit of detail and subtler shadings.


I also experimented with white conté crayons (Chalk Skull, Diabolical Sigil II). I wanted to achieve a chalk graffiti effect, and the white conté crayon worked prefectly. I found three different fragments of crayon in my old school bag, and one of them worked much better than the others. I hope I can find this sort of crayon again in the future if I feel like using it again, although I think its use is limited. In my rather brief investigation as to the composition of the crayons, it may mainly be kaolin clay and wax.
I worked over a matte ground surface, then fired, and to my surprise the colour was fixed to the enamel, and kept part of its gritty texture.

Diabolical Sigil II
Diabolical Sigil I
Spine
group picture

For the necklace parts, I chose sterling silver patinated black and black glass to keep it monochrome, a combination I had already used for TBC II (which I will probably also show in the exhibition, together with TBC III, 2010). A few pieces have onyx substituting for black glass, and/or grey and black banded marble/jasper.

For a few smaller pieces I used only copper and non-precious metal chains to keep costs down.

Thursday, 21 July 2011

Cold

A project I have been working on for the last weeks, is my submission to GreenLion Gallery's upcoming exhibition “The Kiss: Inspirations from The Cure”, running from September 15  to October 15, 2011 at GreenLion Gallery, 150 E Fulton, Grand Rapids, MI, USA, to which I have just been informed has been accepted!
Transparent and opalescent enamels over fine silver,
onglaze paints, sterling silver, amethyst, quartz.
 My submission is titled Cold, after the The Cure song of the same name from the album Pornography (1982) which is one of my favourite albums by them.

everything as COLD as silence
Part of the lyrics (below) written on the inside of the piece

Scarred
Your back was turned
Curled like an embryo
Take another face
You will be kissed again
I was cold as I mouthed the words
And crawled across the mirror
I wait
Await the next breath
Your name
Like ice into my heart
A shallow grave
A monument to the ruined age
Ice in my eyes
And eyes like ice don't move
Screaming at the moon
Another past time
Your name
Like ice into my heart
Everything as cold as life
Can no one save you?
Everything
As cold as silence
And you never say a word


Your name
Like ice into my heart
Your name
Like ice into my heart


For this piece I worked over silver, even though I most commonly work over copper, since I wanted to work with very cool hues for obvious reasons, and I also wanted to preserve the reflection of the metal below.
The following are a few work in progress pictures and explanations. The pictures can be clicked to enlarge:


Working from a photoshopping I did years ago,
sketching, choosing enamel colours and stones. 
Shaping the silver base over plasticine.
First two (three) layers. First I enamelled the back and then
the front with silver flux.  Here after firing a layer of purple
enamel for the hair.
Here showing the opalescence, changing with the angle.
This has about 15 layers (firings). 
The system to hang the quartz needles from, and tube rivets
for a cold connexion of the enamel, fabricated in sterling silver.

I had to drill these natural quartz crystals that I have had for
many years, with diamond bits. Quartz is very hard, this long
 job was very hard on my wrists!

I was happy to see the little prisms diffracting the light!
After painting details with onglaze oil paints, another 4 firings.

Lettering on the inside, also done with onglaze oil paints.

Finished!