Monday 28 November 2011

Sneak Peek

Project 02 (of 13) is finished :D Sample is knitted, pattern is written and laid out, photoshoot done and editing finished! Without giving more away, a cropping of the final image as a sneak peek:


Molehill


I finally got the chance to snap some pictures of this new shawl pattern I had ready for publication for some weeks! My gorgeous friend Georgina very kindly posed for me :))

It is now available in Ravelry.


Wednesday 23 November 2011

Underway

Progress is being made! :D

Pattern 02 is written, sample is knitted and blocked, and a beautiful friend is coming over this Saturday to model it for my pictures. Very exciting! she is just perfect for this sweet character, and very enthusiastic about the project and inspiration for it (this is always nice to hear! :))

This pattern features beading and a little fiddliness, which I think is always nice to make a small project more entertaining! I have decided to shoot some HD videos to accompany these patterns, showing trickier parts etc. Video for pattern 02 is filmed, edited and already uploaded to my new YouTube Channel:


Pattern 01 is underway. This is lace knitted with linen, which gives a whole different look, and also beaded. Pictured is my swatch, but I have decided to use other beads which are on the way to me. Meanwhile the sample is started but on hold.


Pattern 03 is what I am working on right now. This project is a pleasure to knit because of the amazing yarn I am using, plus it has a delightful drape! Truly decadent to knit :)

As you can see in the picture, it features my beloved lacy faggoting stitches, the YOs make it airy, but the ribs created by the decreases still give quite a bit of volume.

These three patterns form the first "chapter" of my project. It is very exciting to have the three of them finished soon. Next is a very ambitious (for me!) pattern, moving beyond accessories... my first garment!

Wednesday 16 November 2011

New newsletter and Twitter! :)


@innerShelterK

Thursday 10 November 2011

Blogging and big project

I have neglected this blog, so much. In fact I ever only posted a few "new pattern" posts, and my last patterns haven't been announced here anymore either. I will not start doing that now. I should put it in the sidebar or something.

No, let's see. I used to really enjoy "blogging" my activities over at Livejournal, so I could do likewise here.

Additionally... I have a big project. I have been developing the idea for the good part of a year, and I have recently gotten started with it. I have been hesitant to talk about it (and only two people know about it), since I realise that it is gonna take me a long time to finish, and I still am unsure if I will publish patterns as I finish them (I am not too keen on this), if I will publish a few patterns only as teasers until everything is ready, or if I should keep everything between wraps until I have it all ready!

I have nonetheless decided to write a little bit about it here, since this blog is very unknown anyway :)

I don't remember exactly how the idea grew in my mind, but I think it was just an idea for one literary-inspired pattern that grew and grew into a collection of patterns. I am now settled on 13 of them. These are very conceptual patterns, in which the shapes, techniques, look and even the yarn composition, colourways etc play a part. They all form a cohesive collection, and even four of them combine into a set of accessories (I love matching sets!). Naturally it ocurred to me that such a collection of patterns best belonged in a booklet format.

In fact, I would preferably present it into an anthology of the works that inspired them, and perhaps some other content I have in mind. This is... a book. Scary! it is a technically challenging and time-consuming project, at least it is for me! Perhaps a little too ambitious an undertaking at my experience level... but I can be stubborn. And my vision is driving me forward in an irresistible manner, so I must oblige. I must try anyway.

Many years ago, I studied DTP. I am still interested in the subject. I do have a clear vision of the layout, typography and overall design, look and feel of this book, and the work for it is already well underway. It helps me have the overall framework in mind as I go along. A little bit of a control freak? In any case this will allow self-publishing if that is the path I end up taking. I want in any case to offer the patterns individually as PDFs.

All of the designs are already well formed in my mind, many of them to the smallest details. Knitting and designing has started on several of them, swatching for others. I have nearly all the yarn I need, which I have been buying in small (and not so small!) batches for the last months.

This is so exciting!

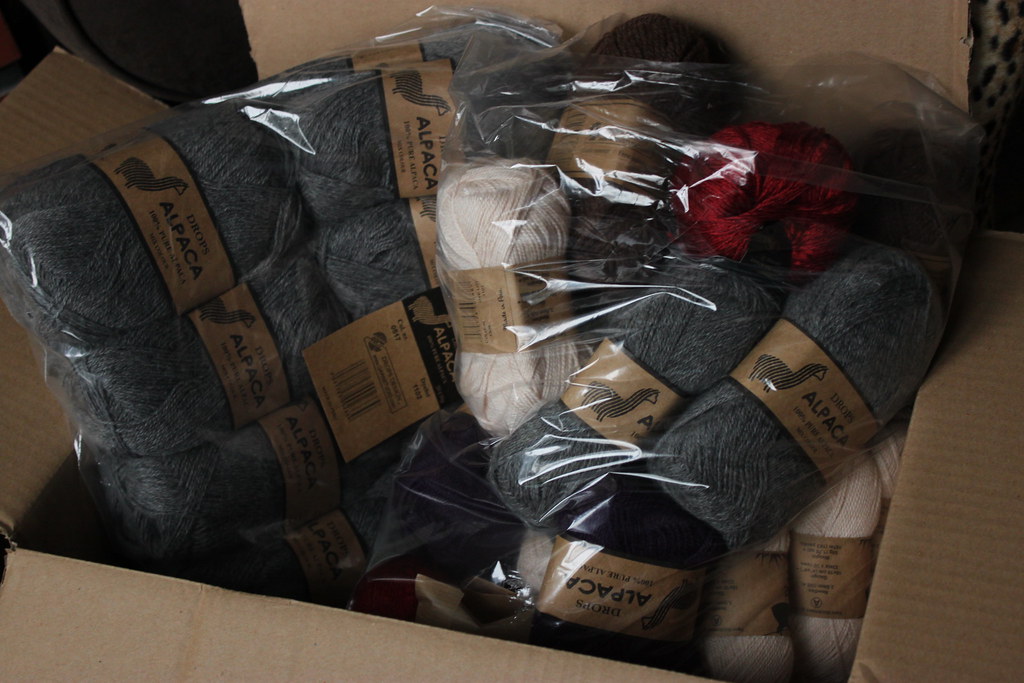
A few swatches. This is for the set of accessories I mentioned earlier. I will allow myself to say, it is a set of fingerless mittens, hat, shawl and "overmittens". The set thus could be worn when it starts to get chilly, fingerless gloves and the shawl draped loosely, and also dress it up for winter with a warm hat and overmittens, and the generous shawl more closely wrapped around the neck. How does that sound?

I have started projects in Ravelry for these patterns as I go along. By now, though, I will only post detail pictures and some notes useful to me (I find keeping these notes in Ravelry to be extremely useful mysefl!), and they have been numbered by their order of appearance.

Wednesday 7 September 2011

Black Series, for "Heavy Metal" expo, NovaBelgica Art Gallery, 30 Sep - 6 Nov 2011

Image © Trëz Orb
Skull I, 2005
Skull III (crow skull)
All images clickable.

For the last weeks, with vacation breaks and other interruptions, I have been working on a little collection for a local exhibition here in Belgium.

I am very excited about this because of the theme and title, which is open to interpretation as if referring to the material or the music - both two of my great passions.
When I first heard about it I just had to ask Tim (gallery owner, whose blacksmith and sculpture work I really admire) to please let me participate! which he kindly did.

Skull X
Skull V (cat skull)
Radius and Ulna lariat
Venus Sigil
I have to say at first I had trouble coming up with designs. I was just too worried about it I think :D but that was just a temporary madness ;) as a main collection, I decided to go for a black series -and that is the very original title I am giving to it- and go back to a theme with which I consider I started to really find my own language, which is the skull (see Skull I above, from 2005), not so much because of the figure itself, but because it sort of set the tone for my work.

Skull IV
I decided to really focus on the skull itself again, and pick up where I left (after all I had only made two Skulls before!) and continue with Skull III to Skull X, and a few other sort of related subjects. You can imagine my delighted surprise when I saw the flyer for the exposition featuring a skull as well.

For this series I wanted to keep the work hours down and the pieces affordable, so I omitted more elaborate hand-fabricated settings. This also allowed me to produce more pieces in a relatively short time which I think kept the entire series quite consistent. I really, really enjoyed making these, most of all -no susprise there- the enamel work.

At the end of the day... I wonder why I have not made more pieces in this style, since it is actually the kind of stuff I like to wear the most :) this should be remedied and I think I will continue the series in the future.

Chalk Pentagram
TBC II, 2009
Skull IX (skull cup)
Skull VII (baby skull)
So, speaking about the enamel, I chose a white over black technique. This is against what we learned in school for vitrifiable paints (onglaze, china paints): build up darker colours over a white or light opaque background. Already back in school days, I remember making a little palette of the colours over opaque black, to see how it worked. It is certainly not possible to attain the same level of detail this way, especially with colour, but I think it is still valid, especially for certain subjects, in my opinion it fits these skull and bone designs pretty well.


I worked with a very oily mix on several pieces (for example Skull III, V, VII, X), which invites to paint more spontaneously, almost like with watercolour, and also allows a fluid line for symbols (Venus Sigil, Diabolical Sigil I), but then poses challenges when it comes to evaporating the oil and firing. I should make tests in the future with more volatile oils, but I am afraid the fluidity will also be affected.
A second or third fire with a mix heavier on the pigment helped achieve a little more detail here and there. I don't think any of the pieces has more than 4 fires (after the initial opaque base of black, which adds 2 to 4 more fires) which must be a record for me :)

For other pieces (for example Skull IV, IX) I worked exclusively with a thicker mix, and I could achieve quite a bit of detail and subtler shadings.


I also experimented with white conté crayons (Chalk Skull, Diabolical Sigil II). I wanted to achieve a chalk graffiti effect, and the white conté crayon worked prefectly. I found three different fragments of crayon in my old school bag, and one of them worked much better than the others. I hope I can find this sort of crayon again in the future if I feel like using it again, although I think its use is limited. In my rather brief investigation as to the composition of the crayons, it may mainly be kaolin clay and wax.
I worked over a matte ground surface, then fired, and to my surprise the colour was fixed to the enamel, and kept part of its gritty texture.

Diabolical Sigil II
Diabolical Sigil I
Spine
group picture

For the necklace parts, I chose sterling silver patinated black and black glass to keep it monochrome, a combination I had already used for TBC II (which I will probably also show in the exhibition, together with TBC III, 2010). A few pieces have onyx substituting for black glass, and/or grey and black banded marble/jasper.

For a few smaller pieces I used only copper and non-precious metal chains to keep costs down.

Thursday 21 July 2011

Cold

A project I have been working on for the last weeks, is my submission to GreenLion Gallery's upcoming exhibition “The Kiss: Inspirations from The Cure”, running from September 15  to October 15, 2011 at GreenLion Gallery, 150 E Fulton, Grand Rapids, MI, USA, to which I have just been informed has been accepted!
Transparent and opalescent enamels over fine silver,
onglaze paints, sterling silver, amethyst, quartz.
 My submission is titled Cold, after the The Cure song of the same name from the album Pornography (1982) which is one of my favourite albums by them.

everything as COLD as silence
Part of the lyrics (below) written on the inside of the piece

Scarred
Your back was turned
Curled like an embryo
Take another face
You will be kissed again
I was cold as I mouthed the words
And crawled across the mirror
I wait
Await the next breath
Your name
Like ice into my heart
A shallow grave
A monument to the ruined age
Ice in my eyes
And eyes like ice don't move
Screaming at the moon
Another past time
Your name
Like ice into my heart
Everything as cold as life
Can no one save you?
Everything
As cold as silence
And you never say a word


Your name
Like ice into my heart
Your name
Like ice into my heart


For this piece I worked over silver, even though I most commonly work over copper, since I wanted to work with very cool hues for obvious reasons, and I also wanted to preserve the reflection of the metal below.
The following are a few work in progress pictures and explanations. The pictures can be clicked to enlarge:


Working from a photoshopping I did years ago,
sketching, choosing enamel colours and stones. 
Shaping the silver base over plasticine.
First two (three) layers. First I enamelled the back and then
the front with silver flux.  Here after firing a layer of purple
enamel for the hair.
Here showing the opalescence, changing with the angle.
This has about 15 layers (firings). 
The system to hang the quartz needles from, and tube rivets
for a cold connexion of the enamel, fabricated in sterling silver.

I had to drill these natural quartz crystals that I have had for
many years, with diamond bits. Quartz is very hard, this long
 job was very hard on my wrists!

I was happy to see the little prisms diffracting the light!
After painting details with onglaze oil paints, another 4 firings.

Lettering on the inside, also done with onglaze oil paints.

Finished! 

Sunday 26 June 2011

26 June 2011

It has been a while! I haven't been keeping up with these entries. I had forgotten about it to be honest!

Today I decided to change slightly the way I do my jewellery. I should in fact work on two (three) pieces I have started, to submit for two exhibitions. One is nearly finished, the other in the same series I had to start over with, and the last is well underway.

But sometimes we just get the urge to do something new, right? I especially do when something is not working out, I then move on to another thing, and after a bit I have renewed energy to face the problematic piece.

So what I have been doing today is...

No... not playing with a monocle. Well, sort of ;)


I have been working on a "master" setting of sorts. I normally produce more enamels than I can ever set, for several reasons: because I prefer enamelling, because I am better at it, because I am lazy about making settings, because I am out of this or that kind of silver, etc.

Working with rich low brass

So I have decided to make a few settings of the shapes I most commonly use, and then have a mold and casts made out of it (silver and possibly bronze as well). This does limit a bit the shape and size of the coppers I make, but after going through my sketch books, I did see certain shapes recurring often, with very slight differences in shape or size. I also thought, that when you buy a painting, you don't necessarily ask for a frame to be done from scratch to suit that particular painting! that can be done sometimes, but for more special pieces.

So, I narrowed down to a number of shapes, and I got started with my first setting. With cast settings, I hope to speed up my production!

Not a round one in fact! Round settings are easy enough to make that I don't think I will make a mold of one.
Shaping both elements into a circle makes it easier to fit them to each other in order to solder them together.
I will then split it again and work the shape I want.
The little piece to the left, though, that was a trickier soldering operation:
First soldering rings to the sheet, then:
Soldering the entire thing to half round wire.

At which point I took a break to eat something and write this down :) back to the workbench!

Edit:

Taking shape. This is all for today though. 

Sunday 10 April 2011

10 April 2011

Today I decided to try another way to build a setting, a variation on something I did before for Givrer. I still had enough silver for this light setting so I went ahead. I built it for the piece I finished yesterday, I haven't decided what I will be calling it yet!

With a pair of matching earrings :)
 It is a rapeseed field in one of the last misty days before Spring.

Enamel over copper, silver foil sterling silver, glass beads and grey moonstone beads.
I love how the light reflects through the yellow and green enamels on to the silver foil. It is a great contrast with the grey around it, and I think it translates rather well the brightness of the yellow flowers in a grey day.
I used some of my treasured and now sadly unavailable uranium yellow. I failed to stock up in time and so now I have so very little left. So sad!

I love to play with the macro objective ;)


 I found these glass beads some time ago. It is sometimes difficult to find exactly what I want. My working process is result-oriented, so I usually have a very clear idea of what I want, and it is sometimes difficult to find exactly the right materials in the exact shade I want!
With this in mind I have been thinking lately of picking up lampworking. I got a book... Then I could make my own beads. I don't know if I understood correctly, but I think I could use my enamels over the glass, wouldn't it be nice to be able to make matching beads? I don't think they have the same COE but I have seen this mentioned in my book and in different places. Perhaps in thin layers? or with a good annealing? (luckly I already have kilns!) it has to be tried :D I shall invest in a few tools and materials soon.